nopCommerce Identity Server 4 Login plugin
by admin | May 25, 2020 | nopCommerce |
Plugin Installation Guide
- Please download the plugin using the link provided after you have purchase the plugin from our store.
- ***If you have installed the previous version of the plugin, please uninstall it and remove from the plugin folder in your nopCommerce site.
- Unzip the file and place the plugin folder (Zealops.IdSLogin) inside your nopCommerce website under IIS (in the Plugins folder).
- Navigate to your nopCommerce site, then the admin page, login with admin login.
- From the admin page, navigate to Configuration > Plugins > Local plugins
- Locate the Identity Server authentication plugin and install it (it might reset the website).
- Then navigate to Configuration > External authentication
- On the Identity Server authentication plugin: click edit and set it to active and Update.
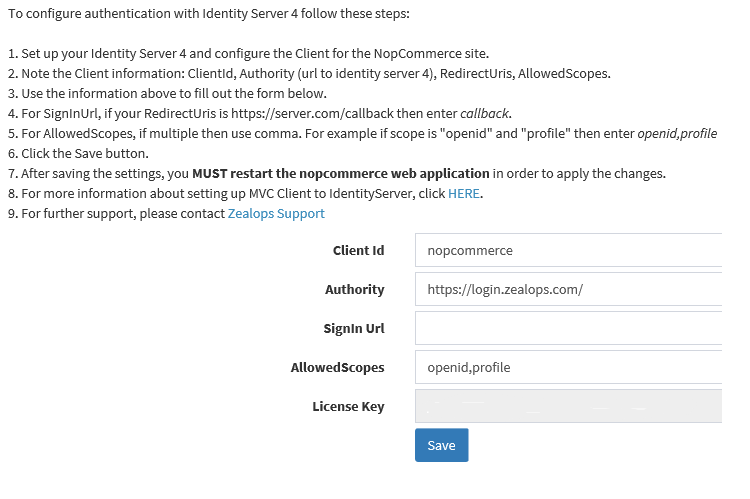
- On the same screen, click on Configure and update the parameters from the instructions on that page, click Save
- Do a reset on your nopCommerce website (iisreset).
- Logout and navigate to your nopCommerce home page and Click Log In.
- Scroll pass the Log In page and you’ll see the “Log in with IdS” button. Click on it and login using your Identity Server 4 credentials.
- You should be redirected back to the nopCommerce homepage with the Identity Server credentials.

Recent Comments